How to Check Bucket Tooth and Adapter Fit Before Replacement
A new tooth can hide a worn adapter for a short time, but it cannot restore the original fit. If the adapter nose, contact faces or retention bore are beyond the system limit, the tooth may move, load the pin incorrectly or expose the adapter to further wear.
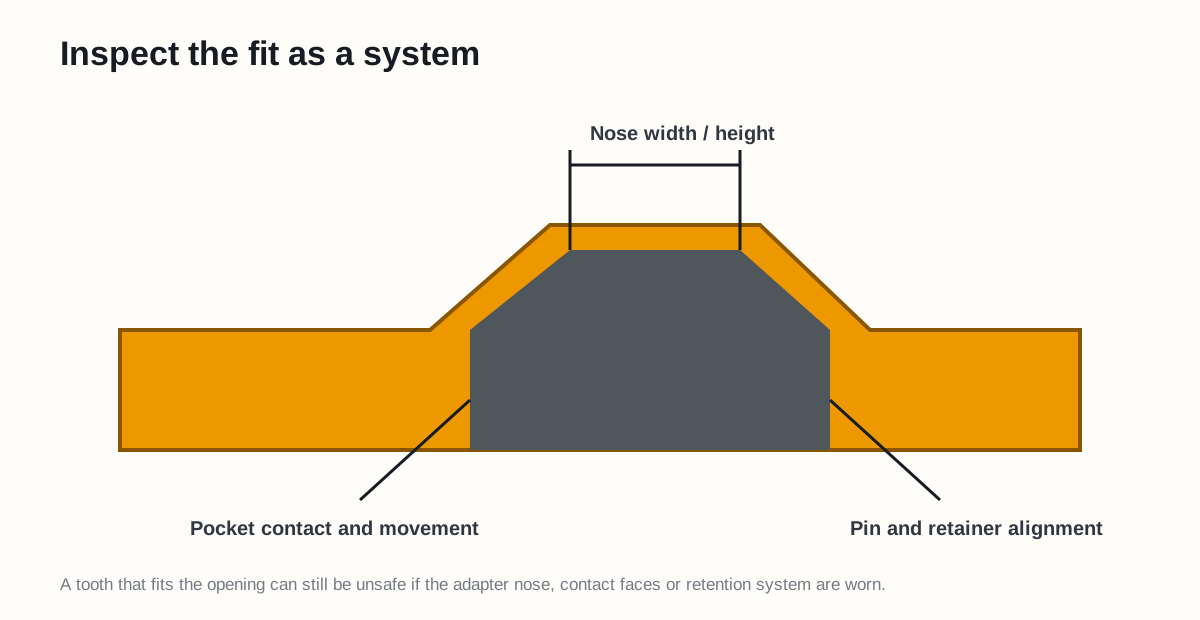
Figure 1. Inspect the mating nose, pocket contact and retention alignment as one system. Exact datums and limits come from the tooth-system manual.
Clean before judging
Lower, isolate and support the bucket according to the Operation and Maintenance Manual (OMM). Remove the tooth with the approved tool, then clean packed soil and loose rust without grinding away evidence. Good lighting and a straight-on photograph make later comparison easier.
Inspect four zones
1. Adapter nose
Look for asymmetric wear, a reduced lower strap, rounded corners, cracks, deep nicks and corrosion. Measure only at the manufacturer’s stated datums. An opening that accepts the new tooth is not proof of acceptable fit.
2. Tooth pocket
Inspect the removed tooth for bright contact patches, hammering, fretting debris and uneven polish. These marks show where load was actually transferred. A narrow contact patch on one side suggests misalignment or local wear.
3. Retention path
Check pin holes, slots, locks and retainers for elongation or damage. The retention device keeps the tooth in place; it should not become the primary surface carrying digging load.
4. Installed movement
After installing the specified new tooth and retention parts, verify seating and permissible movement using the system procedure. Do not invent a universal “wiggle” limit—different designs use different stabilizing contacts and locks.
A practical measurement sheet
| Item | Baseline | Current | Limit/source |
|---|---|---|---|
| Nose width at datum A | System manual | ||
| Nose height at datum B | System manual | ||
| Lower-strap thickness | System manual | ||
| Retention bore/slot | System manual | ||
| Installed tooth movement | Approved procedure |
Record tool resolution and measurement direction. Repeat each critical measurement at least twice. If the worn surface is irregular, report a range and photograph the exact caliper location.
NIST defines measurement uncertainty as the dispersion associated with values attributed to the measurand. In workshop language: a reading is not perfectly exact, and tool, surface, operator and datum choice all contribute. See the NIST measurement uncertainty overview.
Replace or escalate when
- The adapter is at the published dimensional limit
- The bottom strap is worn into the cavity
- The nose is cracked or visibly distorted
- Retention parts move or cannot seat correctly
- The new tooth contacts only on a small or wrong area
- Several teeth show the same unusual side loading
Caterpillar specifically advises replacement when adapter bottom straps are badly worn into the bottom cavity and calls for replacement of damaged or loose retainers. See What to Know About GET.
Do not repair by guesswork
Weld build-up, grinding or reshaping changes fit and metallurgy. Use a manufacturer-approved rebuild procedure and qualified personnel. If the adapter identity or limit is unknown, preserve the evidence and request a system-specific inspection.
Sources
- Caterpillar: What to Know About Ground Engaging Tools
- Caterpillar: J Series Bucket Tip Removal and Installation
- NIST: Measurement Uncertainty
Safety note: never work beneath an unsupported bucket. Follow the exact tooth-system and machine instructions.