Why Cutting Edge Bolts Keep Loosening—and How to Find the Root Cause
Repeatedly tightening the same cutting-edge bolt treats a symptom. A bolted joint stays together because bolt preload clamps the parts. When preload falls—or external load causes the clamped surfaces to slip—the nut or bolt can rotate, the hole can fret and the joint deteriorates quickly.
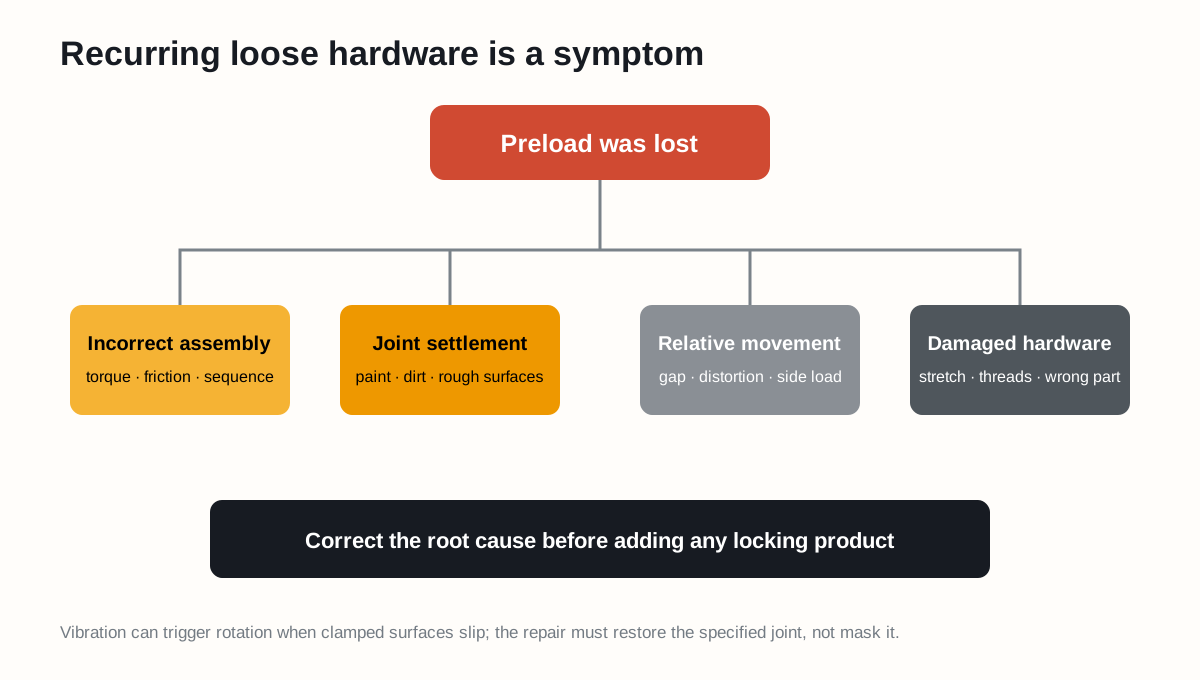
Figure 1. Preload loss can begin with assembly, settlement, relative movement or damaged hardware.
Four root-cause families
1. Incorrect assembly
- Wrong bolt, nut, grade or coating
- Torque copied from another machine
- Lubricated threads where dry torque was specified, or the reverse
- Uncalibrated tool or wrong units
- Head not seated in the countersink
- Incomplete tightening sequence or second pass
Torque is only an indirect method of creating preload. Friction in the threads and under the turned surface strongly affects the result. See Nord-Lock’s torque, preload and friction explanation.
2. Joint settlement
Paint, scale, dirt, weld spatter and rough high spots compress after tightening. The bolt does not have to rotate for preload to decrease. Clean, flat mating surfaces are therefore a fastening requirement, not cosmetic preparation.
3. Relative movement
An edge that does not lie flat, elongated holes, a distorted base edge or side loading can make the clamped surfaces move. NASA testing has linked vibration-induced fastener unwinding to sliding between clamped components. See NASA: Preload Loss via Vibration-Induced Unwinding.
4. Damaged or incorrect hardware
Stretched bolts, rolled threads, worn countersinks and nuts outside their reuse rule cannot reliably recreate the intended joint.
Evidence-based inspection
Before disassembly, photograph and map every fastener:
| Evidence | Possible meaning |
|---|---|
| Bright ring or red/black debris | Fretting and relative movement |
| One loose bolt in a row | Local gap, damaged hole or incorrect seating |
| Several adjacent loose bolts | Surface distortion or sequence problem |
| Repeated head damage | Wrong seat, wrong tool or movement |
| Stretched or necked shank | Excess preload or overload |
| Paint/scale imprint | Settlement source |
Then compare part numbers, torque source, tool calibration, thread condition and installation records.
Correct in the right order
- Remove the machine from service if the edge is loose or structure is at risk.
- Support and isolate it according to the OMM.
- Replace damaged hardware with specified parts.
- Repair cracked, elongated or distorted structure using an approved procedure.
- Restore clean, flat mating surfaces.
- Reinstall using the exact friction condition, sequence and torque.
- Complete the specified follow-up inspection.
Do not add threadlocker, extra washers, double nuts or welding unless the machine or joint engineer approves them. A locking product cannot make a dirty, moving or incorrectly preloaded joint sound.
Sources
- NASA: Preload Loss in a Fastener via Vibration-Induced Unwinding
- Caterpillar: Cutting Edge Systems
- Nord-Lock Group: Safe Bolted Joint Design
Safety note: a loose cutting edge can separate or damage the base structure. Stop and assess it under the approved maintenance procedure.